There was a recent poll on Fast Tracks Facebook site about "If I could improve Fast Tracks products, I would love to see...."
I replied with adding "full sized" turnout jigs. (yes, I know how many you already have!

)
That is to say, ones that will fit a quickstick completely. Let me elaborate. (and maybe prove my case for making the product.

)
I have found it difficult, ESPECIALLY on long turnouts like #8's, once the fast track jig "skeleton" is completed, to keep the open rail ends in gauge when gluing them to the quickstick.
And with the pliobond being contact cement, you really don't have a lot of "wiggle-room" to adjust the gauge/positioning of the open end of the rail (especially exiting the frog) once the rail makes contact with the pliobond. As I said, this problem is exasperated on the longer turnouts. The "open" diverging rails exiting the frog are quite long.
My solution? I built a simple wood jig to add three more PC ties at the three ends of the rail "routes". These were placed right where the last wood tie for the quicksticks would be, so all I need to do to modify a quickstick for this is to cut the last wood tie off on each of the three route ends before gluing.
Now the process is far from perfect, as you will see. This is precisely the reason for me asking about a full sized jig to simplify it.
Anyways, here goes:
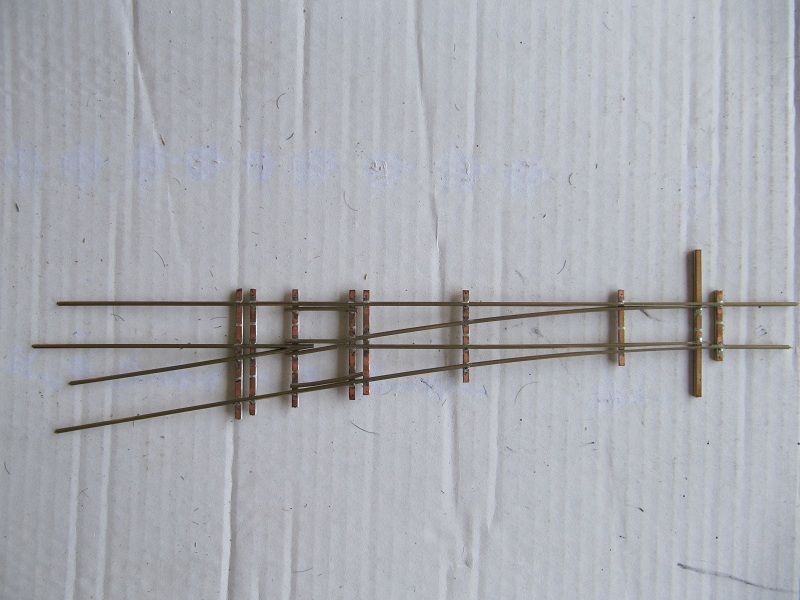
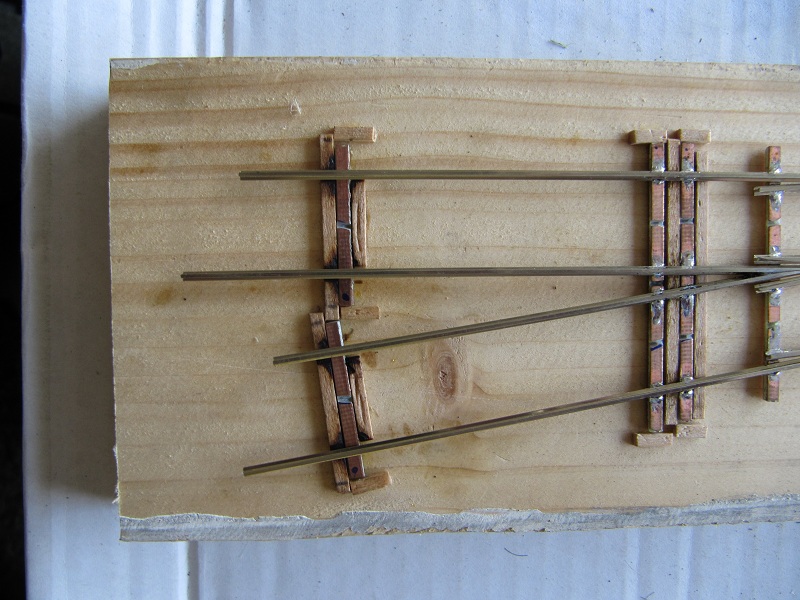
A completed Fast Tracks (F.T.) HO #6 LH jig "Skeleton" (even on a #6, see how long the "unsupported" open end rail is? And I only leave about 1/2" of "waste rail" from where a quickstick end would be)
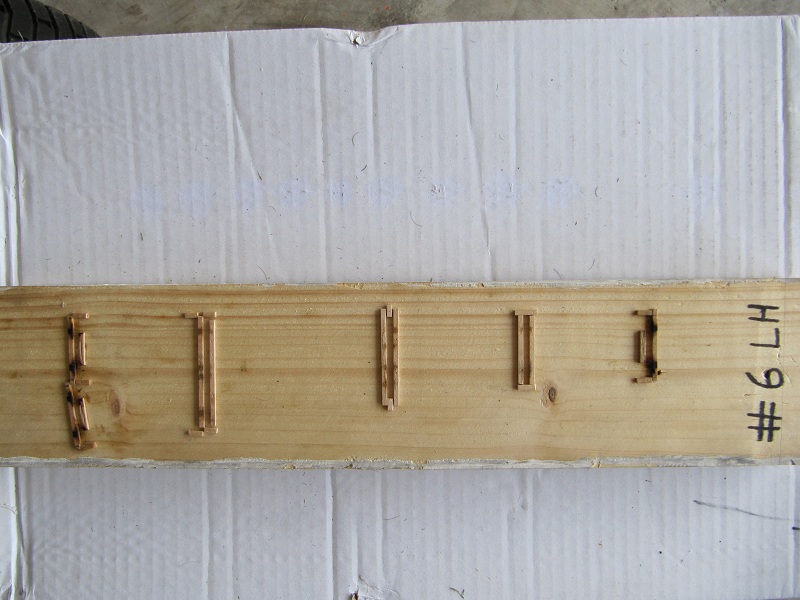
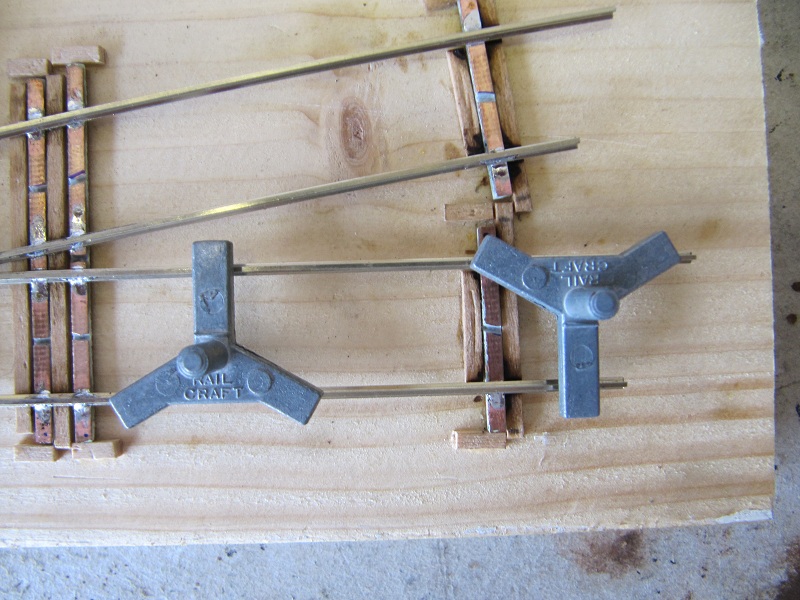
The wood jig with "boxes" for the original F.T. jig built PC ties to fit into, and the "ends" slots for the new PC ties to go into. (where the burn marks are on the stripwood from soldering)
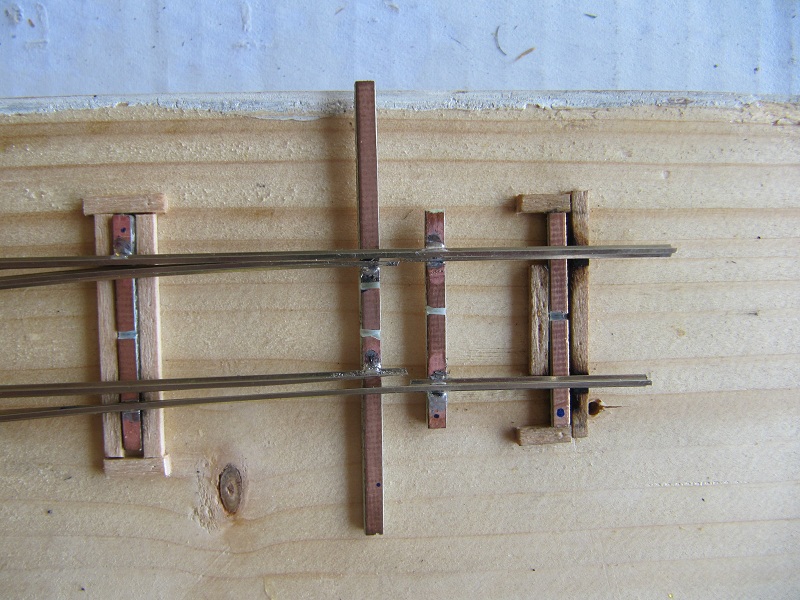
The, as yet unsoldered, new PC tie ends installed in the slots, and the existing fast tracks skeleton installed in the "boxes".
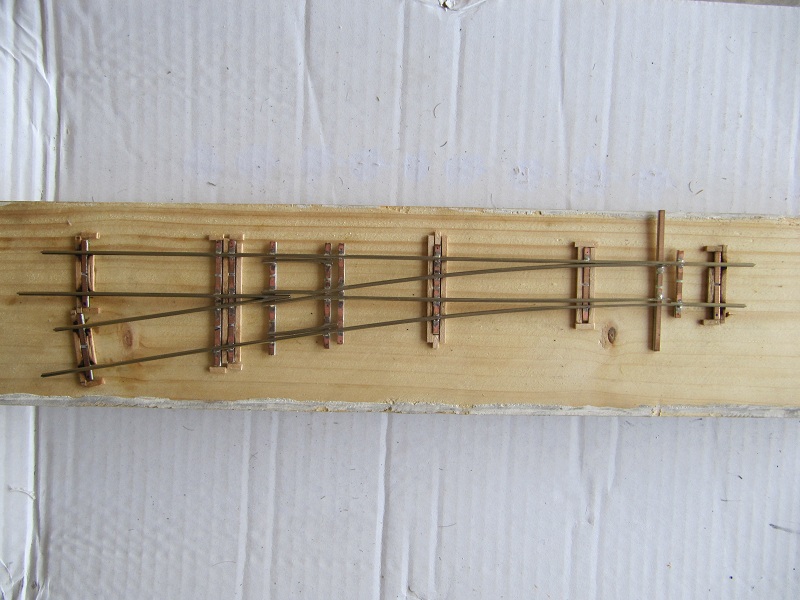
Close up of the "boxes" to hold the existing skeleton.
Close up of the diverging end slots for the new PC ties. (these are located exactly where the last quickstick wood tie is at)
And the throwbar side. (this one is not critical since it's so close to the original F.T. jig PC tie. I just did it to keep the short end in gauge when gluing as well, and to stay consistent)
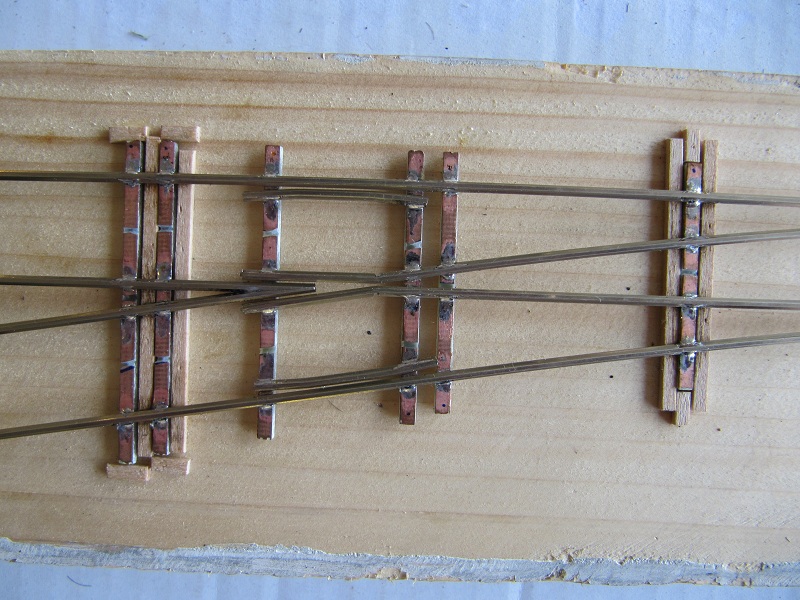
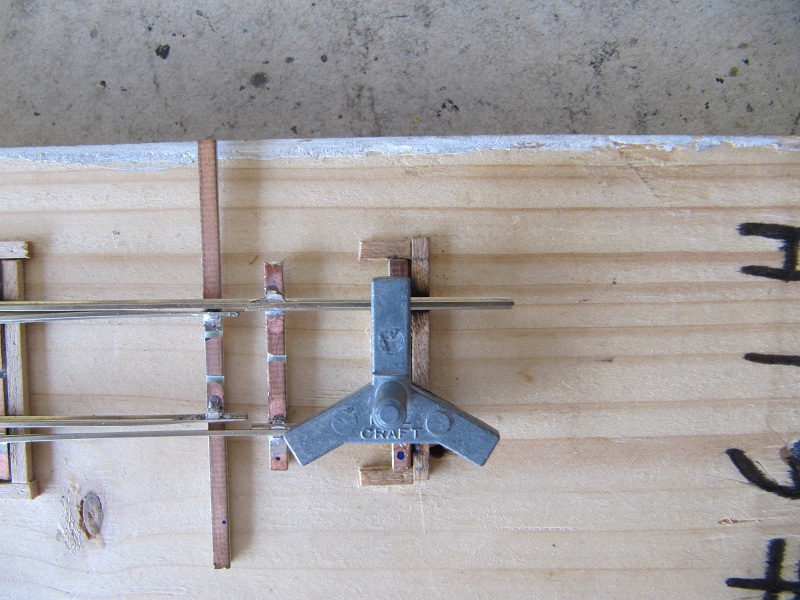
Using 3 point track gauges, I "tack" solder the rail, outside end only, very slightly, to just hold the rail in gauge.
Now on the longer frog end rails, I use a metal straight track gauge (using a wood F.T. sweepstick would probably damage it, over time, from the heat) to keep the rail straight, and tack it in the same manner as before. I also use a small clamp to hold the rail.
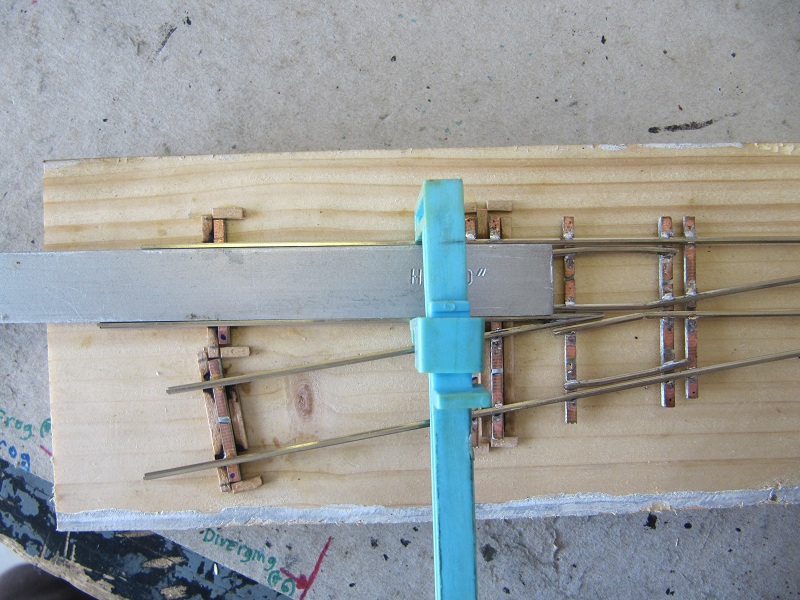
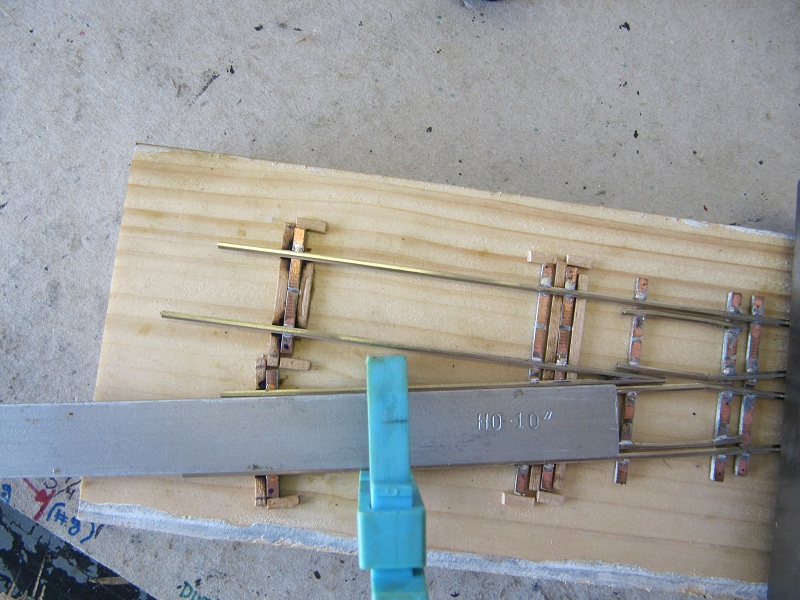
The rail tacked and ready for final soldering. (It did creep below from the flux, and this would probably do, but I go ahead and fully solder them)

Since your doing one rail side at a time, the other side will hold the 3 point gauges in alignment while you are soldering.
Thats it!
Then it's just a matter of cutting the end wood ties off the quickstick. (a simple task to clip them off with a rail nipper) And the new (modified) skeleton will slip in the quickstick straight and true and glue in perfect alignment!
Wala!

Obviously a full "quickstick sized" aluminum template would be far superior to this method not to mention more precise and way faster. And you can see the stripwood is getting pretty burned up already on the ends after only about 15 turnouts. But there you have it. It does really help to mount the assembled skeleton to a quickstick.
My layout plans also call for curved turnouts. (I dont have any F.T. jigs for that yet) but I am assuming they are the same design. That is to say the jig is not full sized to match a quickstick. I can only theorize the issue will only be worse since the rail is curved all the way thru the turnout on every end and the open rail ends would have a tendancy to get out of gauge really easily, so making more homemade templates that have PC ties at the ends of the quickstick will be crucial....Unless you (Fast Tracks) make them first! HA!
Lee

